Pruning for Structure of the Tree
Without doubt the most important way to train a bonsai is to prune it on a regular basis. There are two different techniques:
- style-pruning, which involves more rigorous pruning to give a tree its basic shape or style.
- maintenance-pruning, to maintain and refine the existing shape of a bonsai.
Bonsai Style Pruning
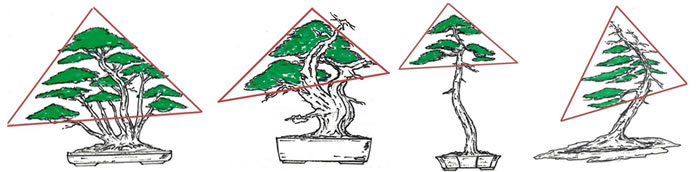
You are looking to create an image, an image of a tree or group of trees but it is miniature, it is an illusion you are trying to create. Looking from a distance at trees regardless of the genus the outline or silhouette is a triangle. You need to work towards creating that triangle and your tree will look ‘tree like’. In each instance, the use of a triangle surrounding the foliage can assist in creating a form appropriate to each of the styles, which in turn highlights a sense of balance and symmetry between the trunks and branches. The basic use of a triangle should be viewed as a guide to the shape being created rather than defining a precise silhouette of the bonsai. The diagrams below illustrate four different examples of bonsai styles showing the triangular effect.
Pruning to Shape
To create the basic shape often involves pruning large branches. Deciding on which branches should stay and which ones should be removed can be difficult, not only because it is an irreversible action but also because it is part of deciding how the tree will look.
Bonsai Maintenance Pruning
The goal of maintenance pruning is to maintain and refine the shape of a tree. Trees will concentrate most growth on the top and outer parts of the tree; it is important to prune these growth areas regularly in order to encourage growth closer to the other parts of the tree.

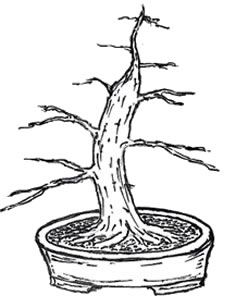
Getting Started
Place the tree on a table at eye-level:
- The first step is to remove all the dead wood from the tree.
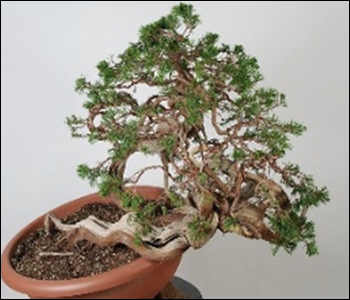
- Now take some time to observe your tree and decide which branches do not fit the desired design and will need to be removed:
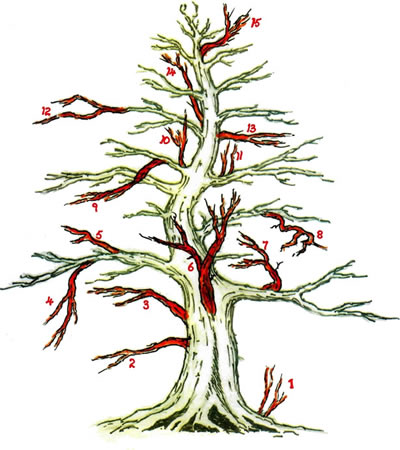
The numbers below relate to the numbers on the tree image
- Suckers that grow from the base of the trunk
- Branches that grow out close to the base
- Branches growing parallel to each other
- Branches hanging down
- Dead branches
- Branches blocking view of the trunk
- Branches growing towards the centre of the tree
- Branches with unnatural twists and turns
- Crossing branches over each other
- Upward growing interior branches
- New shoots higher on a branch
- Branches growing and extending beyond the tree profile
- Branches growing from the same height and position on the trunk (bar branches)
- Branches that compete with the trunk line
- Disproportionately thick branches at the top
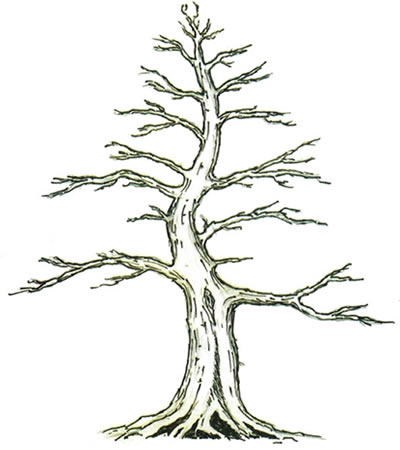
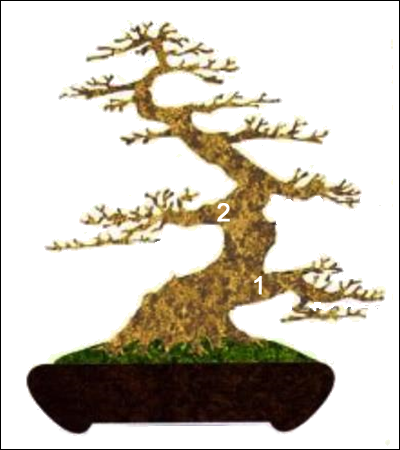
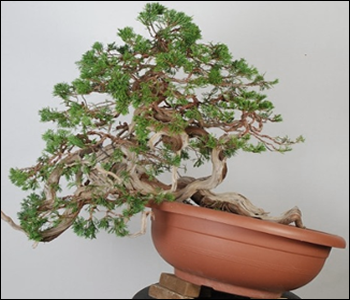
Same tree after the unwanted branches are removed
Developing New Trunk and Branch Structure
The main principles to understand when developing new trunks (new ‘leaders’) or branches are as follows:
- The shoots (be they potential branches or leaders) with the most growth will thicken the fastest.
- The shoots with the least growth will thicken slowest.
- To encourage growth in a shoot, do not prune that shoot.
- To encourage maximum growth in a shoot, prune all other shoots on the tree.
- To stop a shoot growing, pinch back that shoot.
- To minimise growth, do not let the new growth extend (by pinching the new growth as it opens)
A bare trunk stripped of all shoots and branches in the Autumn will produce considerably more buds from the trunk the following Spring. Any existing branches that are left after Autumn pruning will reduce the number of buds that appear on the trunk itself.

The exact shoots or buds to keep will depend on the design you have for the tree. If you are uncertain whether a branch will be required in the future, retain it for the time being. It is always easier to remove a bud or shoot than it to regrow it.

Allow each of the middle branches to extend and open 3 or 4 leaves and then pinch out the rest of the new shoot so it will not extend any further leaving the tree’s resources to be diverted elsewhere.
When the new leader has grown quite strongly it is time to cut off the top of the trunk to create a better taper to the trunk.
A Reminder
- A bonsai has a lot less branches than its big brothers in nature; therefore each one must be important.
- The lowest branch is the thickest. (No. 1) That's logical, it's the oldest.
- The second branch, being younger, is clearly slightly more slender. (No. 2)
- And so on, all the way to the top where the branches of the apex should be very slender.
- The spaces between the branches are also smaller as you go up the tree but they are in an irregular pattern.
Working with Trees
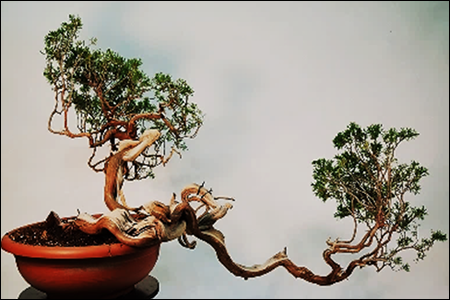
The first thought on looking at this is to suggest removing the excessively long branch with growth only at the tips. This branch does not seem to belong with the rest of the tree. It is so distant from the main trunk and there seems no way of making it part of the tree. So why not remove it completely.
Take a sheet of white paper or card and place it over the offending branch. You see now a small tree that you can start selective branch pruning followed by wiring into shape. You have a potentially good small tree.
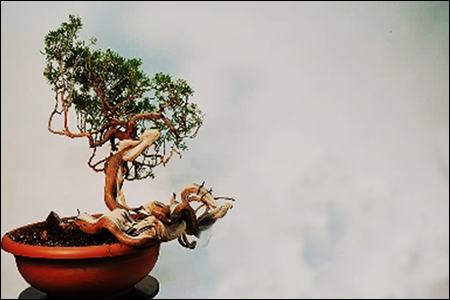
Closely examine the rear of the base of the tree. Look at the extension of the main trunk and the long branch emerging to the right. The main trunk is too thin in comparison to the base of the tree. The taper is not gradual; the trunk is of almost equal thickness all the way up.
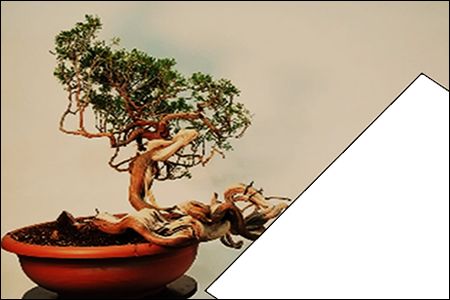
You could turn the base of the branch into a jin?
The more advanced and difficult suggestion to solve this would be to bend the long branch in the middle portion and create the foliar structure around the main trunk. Additionally, the main trunk will be bent towards the left, thus defining the movement of the whole composition towards that side. This would create spaces between the branches to better show the movement of the trunk and branches. The dead wood will be better displayed and give an image of an adult tree.
Do not attempt this option until you have mastered all the basics skills and you have learned to work with deadwood. The creative process goes hand in hand with good techniques, executed with precision.

Web design: nysys